Creative Freedom in Landscape Photography

The most powerful tool you have on any photography trip is your imagination. It’s also usually the biggest obstruction. Like any pursuit involving kit, many of us spend the first few years mastering the technical aspects. Here there can often be quick progression and that satisfies our human ‘need to succeed’ but it can also lead to repetition, and conscious craft over-shadowing creative instinct.

Photography in its past was firmly rooted in documenting the scene in front of the lens, be it for historical posterity or factual accuracy, it was about capturing not creating. Nowadays, we can be masters of our own visual destiny, we can create the unseen. Be it through the use of filters, speciality lenses or techniques such as ICM (Intentional Camera Movement) or ME (Multiple Exposures) we can shape time and form, and the possibilities are endless. We can be proactive in sculpting and creating our own visual worlds and scenes.

However, whilst the equipment we use is only limited by our creative boundaries, the use of any technique should only ever be to service the aesthetic goal, it should not dictate it. For this work to be successful it must mean something. That can simply be in pursuit of an aesthetic vision in a single image or as part of a wider story-telling narrative, but it cannot just be a display of technique. 

Try to be open minded in breaking your own mould. Use different approaches to the landscape, find one area to visit multiple times in differing conditions. Observe what’s in a location from the widest possible point of view down to the narrowest few centimetres of sand or stone.

Experiment with movement, both of the camera and of yourself. Learn to manipulate time by experimenting with shutter speeds, challenge your own compositional habits, physically touch and feel what the location is all about. Perhaps even read up on the local history be it 100, 1,000 or 1 Million years old – try and understand a location and then create a body of work which means something deeper and connects to it.

The possibilities are endless – go for it!

New Printer! Unboxing & Setting Up the Canon Pro-300

The act of printing my images has become part of my image making process. From small prints when collating bodies of work and curating them, through to larger prints for customers. I firmly believe taking control of your own print set-up can help your photography in many aspects, from the point of capture to the final image.

Choosing the Pro-300

I recently decided to upgrade my home print set-up to a Canon Pro-300 from the lovely people at Fotospeed (it’s worth buying it from a reputable company who offer customer support should you need it!). I have access to larger printers for A2+ customer prints when required but I wanted a better pro-level printer at home that could handle up to A3+ in size as that’s what 90% of my print requirements are. I’m not printing multiple images a day and the printer needed to fit onto my home office desk. After a good amount of research and consulting with fellow photographers and suppliers I settled on the Canon Pro-300.

Video Series

Choosing and setting up a new printer can be a little daunting, as such I wanted to create a series of videos that could help guide a potential new buyer through the whole process, starting with a big heavy box and ending up with beautiful prints on the page that match your screen.

VIDEO 1: Unboxing & Set-Up

In this first video I walk through everything that comes with the Canon Pro-300 printer, how to safely and easily set it up. How to connect it to your computer, download the software and prepare the printer for action!

In the second video I’ll be walking through how to make your first print :)

Podcast Interview (Biblioscapes)

I was recently invited onto the ‘Biblioscapes’ podcast (above) to discuss my Mesozoic photo book. The podcast is run by a fellow photographer called Euan Ross who discusses photo books and all things photographic with his guests on the show. He’s also got a great website showing video walkthroughs of a wide range of photographic books that he has collected over the years.

We discussed how I got into photography, the Mesozoic project in more detail, self-publishing books, what I’m working on these days and much more. As part of the show he also asks his guests to briefly discuss 3 photo books by other photographers that have influenced them or that they particularly admire. I’ve listed my 3 below with a few notes on why I choose them:

  1. ‘Analogies’ by Stuart Franklin: This is a very interesting book by the Magnum photographer Stuart Franklin. It explores visual cues and metaphors in the landscape (man made and natural) and how we respond to them.

  2. ‘Another Life’ by Nick Danziger: Over a period of 15 years Nick Danziger visited 8 different countries to explore the success (or not) of the millenium goals set-out by the UN.

  3. ‘Arc & Line’ by Charlie Waite: In my view this is a great example of the work of Charlie Waite over a number of years. Exceptional compositions exploring the aesthetic side of photography’s possibilities.

I hope you get chance to check out the podcast and subscribe to hear from other photographers in the future.

SEEING faces in strange places...

How often have you looked up and seen a face or shape in a passing cloud? Or perhaps done a double-take of a strangely familiar looking rock or the rather human looking twist and stance of a ‘dancing’ tree perhaps? Seeing shapes and human forms in the natural world is a fairly common experience, but how much of that can be consciously controlled or sought out? And what does it say about our connections to the natural world?

New-Zealand-24.jpg

Ridgeline ‘Face’

Can you spot the face? The Ridgeline runs down the middle of the shadow and light, highlighting the nose with the eye off to the right catching the late afternoon light…

I recently posted this image from my ‘Aotearoa’ series to Instagram and was delighted when someone commented that they could see a face (can you see it in the Ridgeline? Once you see it, you can’t ‘un-see’ it!) Although I didn’t mention it in the post in this instance, I had spotted the face as well but not at the time of capture, that is to say not consciously at least.

Often I will be reviewing images and certain similarities to human forms will leap out at me, as in this instance. Had the face registered with my sub-conscious in the infinitesimal time our brain reacts to such obvious similarities? After all what we are seeing is shapes that mimic something so ingrained in our visual recognition systems (the layout of a face) that all sorts of things could be happening in the grey matter!

There are times I edit and curate the images, share them and someone pops up with something I simply hadn't seen. So what is this down to and what’s causing us to consciously or sub-consciously be aware of these similarities?

Pareidolia is the name of this phenomenon, or certainly of seeing faces in objects. There are all sorts of resources on the web about this and people far more qualified than I to discuss it. But, for the purposes of photography what’s interesting is whether we can actively seek these out, or whether it’s happening in our sub-conscious and only sometimes revealing itself later.

Mesozoic_Dino.jpg

MESOZOIC ‘FACE’

After months of visiting the same location, on the very last morning this Reptile-like head leapt out at me from the rock below my feet.

The image above (from my MESOZOIC series) was actually the last image shot in the whole series. The images had been made in a very small area of a local beach over multiple visits. All the while I had this story about pre-history, evolution and the time of dinosaurs rumbling around my head. Then, on the very final day and on the way to packing up I just tilted my head and spotted this unmistakable reptilian head in the rock.

There’s no doubt in my mind that because that subject matter was already rooted in my mind I was ‘able’ to decode this shape and pattern into a form that my brain recognised immediately. Had I not been in the throws of that project I’m sure there’s no way it would have leapt out at me.

Alternative ways of seeing and creating imagery in the landscape to evoke similarities or anthropomorphic qualities is nothing new to photography. Both Alfred Stieglitz and Minor White wrote at length about “equivalence”. That is to say, instead of simply depicting the objective and known landscape in a documentary fashion, artists can play visually with non-human subjects (such as clouds, rocks, trees) to show human characteristics or analogies for actions and shapes we understand in the human world. Stuart Franklin writes about this far more coherently than I do in his books ‘Narcissus’ and ‘Analogies’ (Hatje Cantz Publishing) which I would strongly recommend you check out if you’re not familiar with them.

Mesozoic_D.jpg

DIPLODOCUS

Even after months of shooting the work, editing it, curating it and printing it, I had never spotted this Diplodocus shape in the rock.

In the final example above I’ve circled the hidden subject just to help. And, I must admit this is one I hadn’t spotted, which is wonderful! Whilst giving a talk about this body of work someone in the audience pointed out that they saw a Diplodocus in the pattern on the rock. I’d been looking at this work on and off for 2 years, had shot it, edited it, curated it, made a book out of it and never spotted that at all! For me the image was based around that curved ‘wave’ of rock which I linked to the sea and water themes throughout the collection. I was in a sense blinded by my own obsession with that ‘wave’ that I couldn’t see what was right in front of me.

So, a couple of thoughts to end on:

1) I don’t think it’s possible to always go seeking out these shapes or similarities per se. It would be very easy to create a rather contrived body of work if you force it. Rather it often comes from a deeper and more long-term connection with a particular landscape that you grow to know more intimately. Visiting, re-visiting, recognising the changes and subtle differences through the seasons and of shape and form. Without being too much of a hippy about it, I suspect these things sometimes need to come to you when you are in a receptive frame of mind rather than being sought out.

2) Perhaps it’s good to remember that everyone brings their own eyes, thoughts, fears, hopes and visual baggage to each image. I personally think it’s great when viewers pull something different out that even the creator hasn’t spotted. After all, for every smell, taste or feeling we all experience as humans each is 100% unique to ourselves, and I think that’s rather splendid.

Working ‘With’ Restrictions

Many of us have found our movements restricted during 2020 due to the Covid-19 outbreak. From a photography point of view (and whilst keeping a wide berth from the social/political side of things!) I suspect many have felt frustrated that they can’t travel and explore. Strangely, I find that some restrictions can actually help free us up creatively. They could be restrictions of location, of equipment or time. I ran into a very small scale ‘lockdown’ situation myself back in November 2018 whilst bobbing about the South Pacific…

Wide expanse of the South Pacific

Why Was I There? I was very luck to be asked to fly out to New Zealand and spend 12 days aboard a ship as a visiting photography lecturer and guide. It was a great gig to get and of course it was impossible to say “no” to! I managed to grab 10 days after disembarking to explore the South Island of New Zealand and will be releasing those images in December 2020 (I know, it takes me ages to share stuff!).

However, during the first 12 days of the trip I found myself confined to the cabin onboard. Whilst the ship did head to port every few days we did have an extended period at the beginning of the voyage when it was not possible to dock because of the sea conditions. This happened to coincide with me realising I didn’t have a great stomach for sea sailing but you know, you’ve just got to get on with it!

Stuck Onboard! As someone who prefers to roam alone with their camera I found being stuck onboard slightly disconcerting, BUT in some ways it was a very liberating time creatively. When you are restricted to your onboard surroundings the trick is to try and be visually receptive to what’s around you. The deep blue of the sea & sky contrasted against the bright whites of the Ship made for some interesting black & white treatment.

Any of you who’ve seen me talk or been on a workshop with me will also know how I love to shoot in little series and projects. This is something I put into practice at the location, during the edit and in the final presentation. With my camera set to black & white mode the above images are very close to what I was shooting at the time, this is vital if you’re trying to pull together aesthetically consistent and coherent sets when on location.

Advice for restrictions? My advice to anyone with a restriction on their travel or kit is to embrace it! I sometimes ‘make’ people stick to one fixed lens or focal length when on tours with me so they can really start to see in that length. We all walk around with too many options, both in terms of kit and locations, and in my experience we’re often blinded by choice.

Start small, perhaps in your garden or local woodland/beach if you’re lucky enough to be near one. Take one camera, one lens, and fix your focal length. Then make repeat visits to that location many times in various conditions and you’ll start to ‘see’ images in that focal length, and you’ll also start to appreciate the subtleties of that location. Hopefully then you’ll also start to make great images.


LiveStream Sessions - Tuesdays 8pm

We all know 2020 has been a difficult and simply weird year! We have all had to adapt and change our ways of communicating and connecting. Since the Summer I’ve been running a weekly LiveStream session on the Light & Land Facebook page. The team at L&L wanted to reach out and connect with their audience in a ‘new normal’ way and I put my hand up to host the sessions and take the viewers on ‘virtual tours’ around the world with various co-leaders.

We started out with Joe Cornish and Charlie Waite in week 1 & 2 and have since gone on to explore locations and images from the Lake District, Jordan, New York, Stockholm, Slovenia, Italy, Romania and many more. As well as the ‘virtual tours’ we’ve also been doing some creative editing session with myself and Adrian Beasley. And, I also run a monthly ‘Pixel to Print’ session where I discuss the creation of an image from location all the way through to a final live print!

‘Inner Landscapes’ - Shooting Local & Lockdown Projects LiveStream

LAST WEEK: Margaret Soraya (in the 1st half) and I (in the 2nd half) discussed shooting locally (very useful in a Lockdown!) and also a couple of projects we embarked on during the first Lockdown here in the UK. Our work is quite different and so is our approach in some ways, BUT in many other ways it’s very similar as we seek to make engaging and meaningful work.

If you fancy joining in live you can find the sessions on the Light & Land Facebook page and we’re also now streaming at 1080HD to YouTube for the best image quality.

NEXT WEEK: On Tuesday 17th November (8pm UK) I welcome Charlie Waite to the next LiveStream. He’ll be discussing some images from his archives and chatting about the importance of looking back, assessing your images and noting how you have changed your visual approach. Join us live via Facebook, or via the this YouTube post to ask questions and interact with myself and Charlie.

Puglia - Sep 2019 Tour Recap

I’ve just come back from this years Puglia photography tour for Light & Land, and yes, I am missing the late 20 degree heat!! This was my first year running this particular tour but not my first trip to Puglia, in fact it’s an area I’ve grown very fond of, and each time I visit it reveals more of its visual treasures. When the chance came to lead this tour I was more than happy to say “Yes Please!”.

The tour is split into two main sections, for the first 3 nights we stay in the small harbour town of Giovinazzo, just north of Bari on the east coast of Puglia. Then, we move inland to Alberobello, well known for its mass of Trulli homes and stay there for 2 nights before heading back to the UK.

On any trip I spend time discussing ways to approach various locations, all the while my job is to enthuse guests to expand their current approach as opposed to imposing mine. The last thing I should do is create a group of mini-me’s - it’s the sin of any teacher!

Days 1-3: Giovinazzo & Surrounding Area

Our base for the first 3 nights of Giovinazzo is an attractive small harbour town. The hotel is situated within the old town walls and even offers a rooftop terrace for a very quick and easy sunrise or sunset location. From here we branch out to other locations such as Matera, Polignano a Mare, San Vito and Santo Spirito. Each has it’s own charm, visual character and story as the guests found out.

Santo Spirito Harbour

Santo Spirito Harbour

Usually we start with a couple of hours in Santo Spirito on the day of arrival. This area sits behind a couple of long harbour walls and offers a snapshot of the variety of environments we encounter throughout the week in one small microcosm, let’s call it something of a photographic warm-up.

From small details of fishing boats and paraphernalia, to the clean lines of the local architecture, to opportunities for more minimalist long exposure shots. I try to use this area as a visual introduction to Puglia, which may be very different to the guests local environment in the UK. It’s hotter, flatter and commonly featuring a lot more blue sky in Puglia so it can take a few sessions to start to adjust the eyes accordingly.

Movement in San Vito

Movement in San Vito

On our 2nd day we visit San Vito and Polignano a Mare. In the harbour of San Vito there are gloriously coloured boats bobbing gently in the harbour. We discuss ways to try and represent and show that movement, essentially trying to stimulate the thought process of taking images about things, not just of things. ps - This is also site of an extremely good local restaurant (more on those later!)

Polignano a Mare earned the nickname of “Clacton” in our group this year after I explained that ‘a Mare’ essentially means ‘on sea’ and before you know it someone piped up with “like Clacton!?”. No knock on Clacton-on-Sea but I suspect we had better weather in Polignano and here the guests were tasked with really concentrating on, and highlighting, the clean angular lines (and bright white colour) of the architecture here.

Shapes in Polignano

Shapes in Polignano

Heading inland on Day 3 we visit the fascinating Matera, European City of Culture for 2019. This city is carved into the rock and sits astride a large hill with stunning views all around. Matera has an interesting back-story, it had seen various settlers throughout the last 2,000 years but it came to ‘fame’ in Italy around 60 years ago when it was discovered that many families were essentially still living in caves, with children and livestock all under one roof. These rock ‘shanty towns’ were called the Sassi (Sasso is Italian for Rock). Word spread and it became a national scandal that people were still living in this way after the second world war.

In the end, the citizens were moved out of the rock Sassi homes and re-located, some more successfully than others. As part of the tour we visit a local heritage centre where there is an interactive video presentation explaining the history of Matera. It’s important when shooting any location that you have some knowledge of it’s political and natural history, all these elements should be put into your visual melting pot so you can seek to included some of these themes or references in your image making there.

Cave Dwelling in Matera

Cave Dwelling in Matera

Days 4-6: Alberobello & Surrounding Area

After this first part of the tour we head inland to Alberobello for a couple of nights. We choose this time because Alberobello plays host to the Festival of Saints Cosmos & Damian and the town is awash with music, lights and celebrations. This makes for many great photo opportunities and all the guests really enjoyed the buzz around the town, including some great quality local bands playing traditional Italian songs.

However, it’s not all party-time, Alberobello is world renowned for its concentration of Trulli homes. These traditional Puglian homes have been in existence for hundreds of years. Made of dry-wall construction, without water, the design facilitated a quick way to disassemble your lodgings should the Kingdom of Naples tax collectors come knocking!

They are fascinating buildings and no doubt the shape of the roofs in particular are very photogenic. One way to put together a story of the Trulli is to capture many small details and present them in a set or panel of images. Another is just to solely focus on those dynamic rooftop shapes and capture them with a complimentary medley of sky and cloud.

Trulli Rooftop Cones

Trulli Rooftop Cones

From Alberobello we also reach out to locations such as Locorotondo (regarded as one of the Top 10 prettiest villages in Italy) and Ostuni. Also in this leg of the tour we get to spend some time exploring an area of olive groves. Some of the trees here are hundreds of years old and have such texture and character in their trunks.

Puglia has had some issues recently with an aggressive plant bacterium that has wiped out around 15% of the olive trees in the area. With an olive tree population of 60 million (!) this destruction is no small feat. Currently Puglia produces around 40% of Italys olive oil output and scientist and farmers are working hard to secure the trees in this beautiful region for plenty more generations to enjoy.

Olive Trees

Olive Trees

In summary, this is a tour that covers an array of photographic situations and opportunities. From the clean angular lines of the architecture, to the more traditional shapes of the Trulli homes. We also get chance to shoot in harbours and by the sea to experience the movement and dynamism of coastal photography, plus some quality time spent wandering in the olive groves and local landscapes.

I’ll be leading this tour again in 2020 and places are now available to book. It would be great to see you in Puglia, and as I hinted at before, I can promise you the best food and drink you’ll probably find on any Light & Land tour!

Dolomites - Summer 2019 Tour Recap

I wanted to just post a blog about the recent tour I ran for Light & Land to the Dolomites in June 2019. It’s an area I know very well having made nearly 20 trips there in the past few years. I’ve been lucky enough to visit at various times of the year and along with deep winter, the early Summer is my favourite time.

Dusk in the Dolomites

Dusk in the Dolomites

The views on this trip start from your approach into Innsbruck on the plane. Nestled between the mountains, Innsbruck is a small but busy city of around 300,000 and it offers a very scenic route in on the flight path. I’d arrived a few days earlier so met up with the group at Innsbruck and we made the drive (also full of great views!) down into Italy and to our base in Colfosco.

Only 2 of the members of the group had visited the Dolomites before, one a number of times and the other just briefly some years back. For the other members of the group it was their first taste of this stunning area. The closer you get to Colfosco in the Alta Badia region, the more amazing the views get so there was lots of anticipation for the coming days of photography.

We arrived in the early evening at the hotel so after dropping the bags in our lavish rooms (also with amazing views!) we walked up the road to a small viewing point just to familiarise the group with our ‘home’ location. As is the case in new places there were lots of “oohs” and “aahs” as the sheer scale and jagged nature of the mountains became apparent up close and in the late evening light. However, we had a very early alarm call (4.10am) so it was soon off for dinner and bed.

Sunrise at Passo Gardena

Sunrise at Passo Gardena

The following days provided a variety of shooting scenarios. From early morning sunrise sessions, through to high altitude cable car rides and even some inner landscape detail shoots. I feel it’s important to pace the trip correctly, with ample time to explore each scenario and vista and really get to know the area.

During our first day we were treated to a stunning sunrise at Val Gardena, this spot is probably amongst the most well known on the trip. The near panoramic views make it ideal for sunrise and also sunset at certain times of the year. Our first morning was something of a gift and it really was one of those situations where you had to be fully attentive not only to what was happening in front of you but also to everything else around you. Having experienced a number of sunrises here I was happy to help prepare the group for where the light would be and when, then at the time it’s a case of working with each individual to help them craft something based on their vision and reaction to the scene.

Later that day we visited the Passo Pordoi cable car which takes you up over 3,000m to Sasso Pordoi for some simply stunning views of the surrounding Sella Group of mountains and the impressive Marmolada. Here we discussed how to deal with such grand scenes with seemingly never ending vistas. Learning how to distil the scene succinctly into a coherent collection of shapes, lines, light and form. Essentially it’s about really being selective about what is and isn’t in the frame. Usually you’ll need less than you think.

Near Passo Pordoi

Near Passo Pordoi

When the view stretches for miles in front of you, and if you’re at altitude looking across or down (as opposed to up at it) one strategy is to deploy the longest lens you have. This helps cut-out vast swathes of unnecessary visual ‘clutter’ and we talked about how in my opinion it’s sometimes important to compose differently when using longer lenses. It can be helpful to look for very bold, strong shapes and elements that split into 2 or 3 distinct groups.

In the image above you can see by just selecting a small segment of the mountainside we can still afford the frame some ‘space’ visually between the mountain and the clouds. Essentially this breaks the scene into 3 roughly triangular shapes, which in themselves offer some dynamism because of the angle and this matches the jagged nature of the rocks. Using Black & White in this scenario also helps deal with some of the haze you can experience at higher altitudes and more importantly it allows for a common relationship in colour/tonal weight between the mountain and clouds, the sky is also allowed to be essentially blank so as to not pull the eye and again to compliment another element, the snow. Essentially you are dealing with quite literally shades of Black & White!


An absolutely amazing tour amongst Europe’s most superb and dramatic mountains. Sam certainly knows the area and took us to easily accessible views in the heart of the peaks - and all at the perfect time of day. He was very attentive to each participant’s needs and level of photographic experience, advising each as necessary whilst giving us the space to “make” our own personal images.

Combine that with almost perfect photographic conditions with rainbows on request, which has ensured that I have returned home with an SD card full of amazing images. A FANTASTIC TOUR!!! 👍
— Feefo 5* Independent Review

Inner Landscape - Mountain Stream

Inner Landscape - Mountain Stream

Although this area is obviously well known for its huge mountain vistas, I did want to help the group explore their visual creativity by spending some time on the inner landscape. I’ve found a small but interesting area with a series of waterfalls and small rapids in a nearby mountain steam and so we spent a good couple of hours here exploring. The idea very much being that in these scenarios the image doesn’t always immediately present itself. There’s a couple of ‘obvious’ shots like there would be in the big vistas, but I really wanted to encourage the group to seek out and craft their own images using the flow, energy and shape within the water.

Sometimes you have to practice what you preach and so after making sure everyone was in full flow with their image making I took a few moments to shoot the image above. The aim of this location and indeed of making this image, and sharing it with the group, was to really encourage them to consider not only the obvious scenery when on a trip but also to consider the unseen.

During our Light & Land trips the aim is not only to give you a great few days experience in a location, but also to furnish you with the inspiration, skills and enthusiasm to go back to your own patch and create some unique images. Finding a small stream locally could afford you similar opportunities when you know how to look and how to start crafting well balanced images using energy and flow.

From Rifugio Lagazuoi

From Rifugio Lagazuoi

Throughout the next couple of days in Alta Badia we visited various wide vistas and some more intimate scenes within the valleys. I did just want to pick out one location in particular which is up at the Rifugio Lagazuoi above Passo Falzarego. This area (as seen above) offers spectacular panoramic views and we were lucky to have some interesting cloud and passing weather in our morning session here.

However, this place has a great deal of history to be considered, and I was delighted that we had booked a tour with local guide Andreas. Fully decked out in his Austrian WWI outfit, Andreas told us the full history of this particular mountain pass and some of the horrific events that had occurred here in WWI.

The Austrian troops had dominated early on because of their superior positions at the top of the mountain, but over a period of time the Italian troops tunnelled away and eventually ended up blowing a huge part of the mountain apart to try and break the Austrian position. This battle played out over many months and through a couple of cold, bitter winters during which they had record levels of snowfall. Our visit in early June saw some snow still on the ground and it was pretty chilly, you can’t begin to imagine months on end of freezing temperatures in clothing that is far below todays standards for insulation.

The Group with Andreas (in full military gear with heavy rifle!)

The Group with Andreas (in full military gear with heavy rifle!)

Knowing this history highlights the importance of looking beyond the stunning aesthetic nature of some of these locations. We discussed how as a photographer you might consider some of these stories to reflect or represent the location in a different way visually. In the image below for example, just imagine being a young 18/19 year old soldier, commonly from other parts of Italy, being stuck in this freezing cold, desolate feeling place. Days or weeks could go by in the Winter with no sight or sound of anything except these freezing peaks and the constant threat of gunfire or explosions.

My belief is that if you can start to connect to some part of a locations history either geographically or with human stories, there is a much higher chance of starting to create meaningful images that go beyond the ‘of’ and consider the ‘about’.

Towards Tofana di Rozes

Towards Tofana di Rozes

Throughout the next few days we carried on exploring the Alta Badia region. At this time of year there really is great variety in the shooting subjects and conditions as you can hopefully see from the small selection of images here in the blog. Even during mid morning and mid-afternoon there can be great light which really moulds and sculpts the rocky features of these mountains.

Sasso Piatto, Cinque Ditta & Sassolungo from the Sella Pass

Sasso Piatto, Cinque Ditta & Sassolungo from the Sella Pass


I really enjoyed the trip and learnt a lot about using my camera. Excellent guidance from Sam Gregory, excellent locations and superb hotels.
— Feefo 5* Independent Review

As we approached the final afternoon and evening of the tour we moved from our base in Colfosco to the Alpe di Siusi area. This area is the largest high-altidue alpine meadow in Europe. It’s become very well known due to its incredibly picturesque scenery and the fact that essentially it’s cut off to cars and through traffic. This creates a peaceful experience for you to explore on foot and using the provided bus service.

After arriving at our exceptional hotel in mid afternoon we headed out to explore this area. At this early summer time there are flowers in the fields and the grass is vividly green with great undulations in the fields.

In the Meadows - Alpe di Siusi

In the Meadows - Alpe di Siusi

After a pleasant afternoon strolling and picking out shapes, and moments of fleeting light in the landscape we headed back to base for refreshments and re-energising before the evening sunset shoot. I’ve been in this location a number of times, BUT I’ve never experienced the kind of sunset we were about to witness…

The early part of the evening saw some nice side light and because there was still some weather rolling around the peaks I could tell we might be in for something special. The group had been finessing their compositions and waiting patiently for a couple of hours. We’d had some good image making possibilities already and there was the odd murmur about dinner…however, I decided we should really hang on to not miss anything. As it happened we were then treated to a mad 15 minutes of passing light, rain and resulting rainbows that stretched out above the view in front of us.

Evening Light - Alpe di Siusi

Evening Light - Alpe di Siusi

As mentioned earlier in this blog, I’m one for seeking out images, looking in lesser known places and really trying to craft a scene using shape and flow. However, sometimes there’s nothing wrong at all with letting something incredible just unfold in front of you! Although we’d had some time to finesse compositions and preferences, when this light unfolds in front of you it’s easy to loose your calm! It’s in these moments it really pays to know your camera settings, know how a polariser can affect a rainbow, and have your framing ready. What’s most important though, is to sometimes look up from the camera and soak the scene in with your eyes, never let the frame get in the way of a life experience.

As you can imagine we headed back to the hotel on something of a high and we had a great final evening together praising our luck with the weather and also enthusing about this amazing part of the world.

We still had one final sunrise together and true to form for this trip, the weather delivered once again. After a rather tame start, the side light flooded across the meadows and lit up the side of the mountains. I find this is typical of how the Dolomites works, the final day is something of a tease, reminding you why it’s so important to come back again and enjoy this spectacular scenery…why not join me in 2020 on our next tour here! (More Info)

Sunrise - Final morning

Sunrise - Final morning

I’ll leave the final thoughts about the tour to one of the guests who kindly took the time to fill in some feedback. You can see all the reviews via the Feefo website.

At the risk of hyperbole, this was simply a wonderful trip in a fabulous area with enormous photographic potential. The hotels were excellent as were the food and the logistical arrangements.

The key to the success of the trip, though, was the leader, Sam Gregory. He was very organised, had good knowledge of the area to optimise the photographic opportunities and he imparts his considerable photographic wisdom with a light touch and an admirable humility. I learned a great deal from him on composition, technique and post-processing. I could not have asked for anything more from this trip.
— Feefo 5* Independent Review

The Image Making Process

The idea of this blog post was to discuss the importance of the images the public don’t see, but which make up part of the process for the photographer. Inspired by a recent visit to a Willy Ronis exhibition in Venice and with a little example of my own, I also consider how shooting digitally may affect the process…

Who was Willy Ronis?

Willy Ronis was a French photographer well known for his street & social documentary photography. His work was chosen by Edward Steichen to be displayed in the 1953 ‘Work of Five French Photographers’ exhibition at the Museum of Modern Art, New York (MOMA). Not long after, in 1957, he was awarded a Gold Medal at the Venice Biennale, this is one of the reasons his work is currently on display at the Casa dei Tre Oci in Guidecca. Amongst the 120 images on display there are also some of his contact print sheets & negatives which inspired this blog.

The Working Process

It’s always fascinating (I think!) to see the images that didn’t ‘make the cut’ so to speak. Looking at a set of negatives can start to reveal some of the working processes of the photographer and indeed the route to construction of certain images. Take this famous example below, in the text at the exhibition Ronis explains that he was alerted to the Gondolieri as their voices became audible to his left, he knew he would have one chance to make the image as they walked across the scene and ‘click’ there it was.

Image: Willy Ronis (1910-2009)

What’s clear in the contact sheet prints is that he’d been waiting here for at least a number of minutes watching various potential scenes unfold. This is one of six images made at that location, each one no doubt building to the ‘decisive moment’ which he chose as the ‘winning’ image from this scene. You see in the contact prints a change in exposure and also how the image needs some action on the right hand side to balance and impart energy, it changed the dynamic totally from just the ladies chatting with the child. He knew this of course and it was a matter of waiting for the characters to enter the scene accordingly.

There are however also examples of images where the moment was so fleeting that just one or two images were made, these are times where it’s now or never. In the image below (also in Venice) there were just two versions on the contact prints, the first with the girl heading out (as shown below) and the second with her returning.

Image: Willy Ronis (1910-2009)

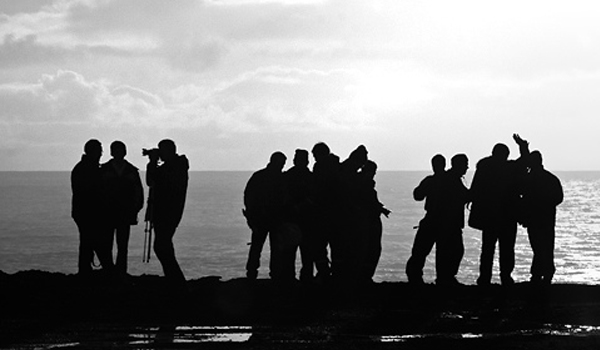
In the second image, the girl is returning towards the street and her body is directly in line with the wooden support on the gangway. This is just one of the reasons why the first image (as shown) is stronger, because of the separation and balance of elements, but also perhaps because here she is heading somewhere, but we’re not sure where. It’s an extra element of intrigue, the beginning of a journey into a relative unknown, however brief.

Modern Relevance?

So, what does all of this have to do with anything we may be thinking about in our photography today? Well, firstly many of us now shoot digitally which has an affect on our ‘in-field’ processes. The ability to immediately assess an image on the live view or viewfinder review screen helps inform our aesthetic choices. For the film photographer it’s an expensive habit to shoot and re-shoot scenes without being able to quickly see the results. It does also depend what style of photography we might be shooting though.

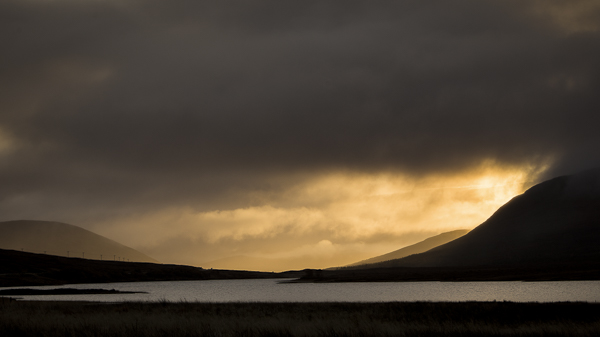
For example, the street photographer is often waiting for a scene to unfold, for characters out of his/her control to enter the scene and to react accordingly. It’s a situation that may also apply to landscape photographers, we may be waiting for a change in weather or the flow of an incoming tide for example. All genres excel in the ‘optimal light’ for the scene and of course the craft is to make compositional sense and order out of whatever the elements in front of us may be.

My Approach

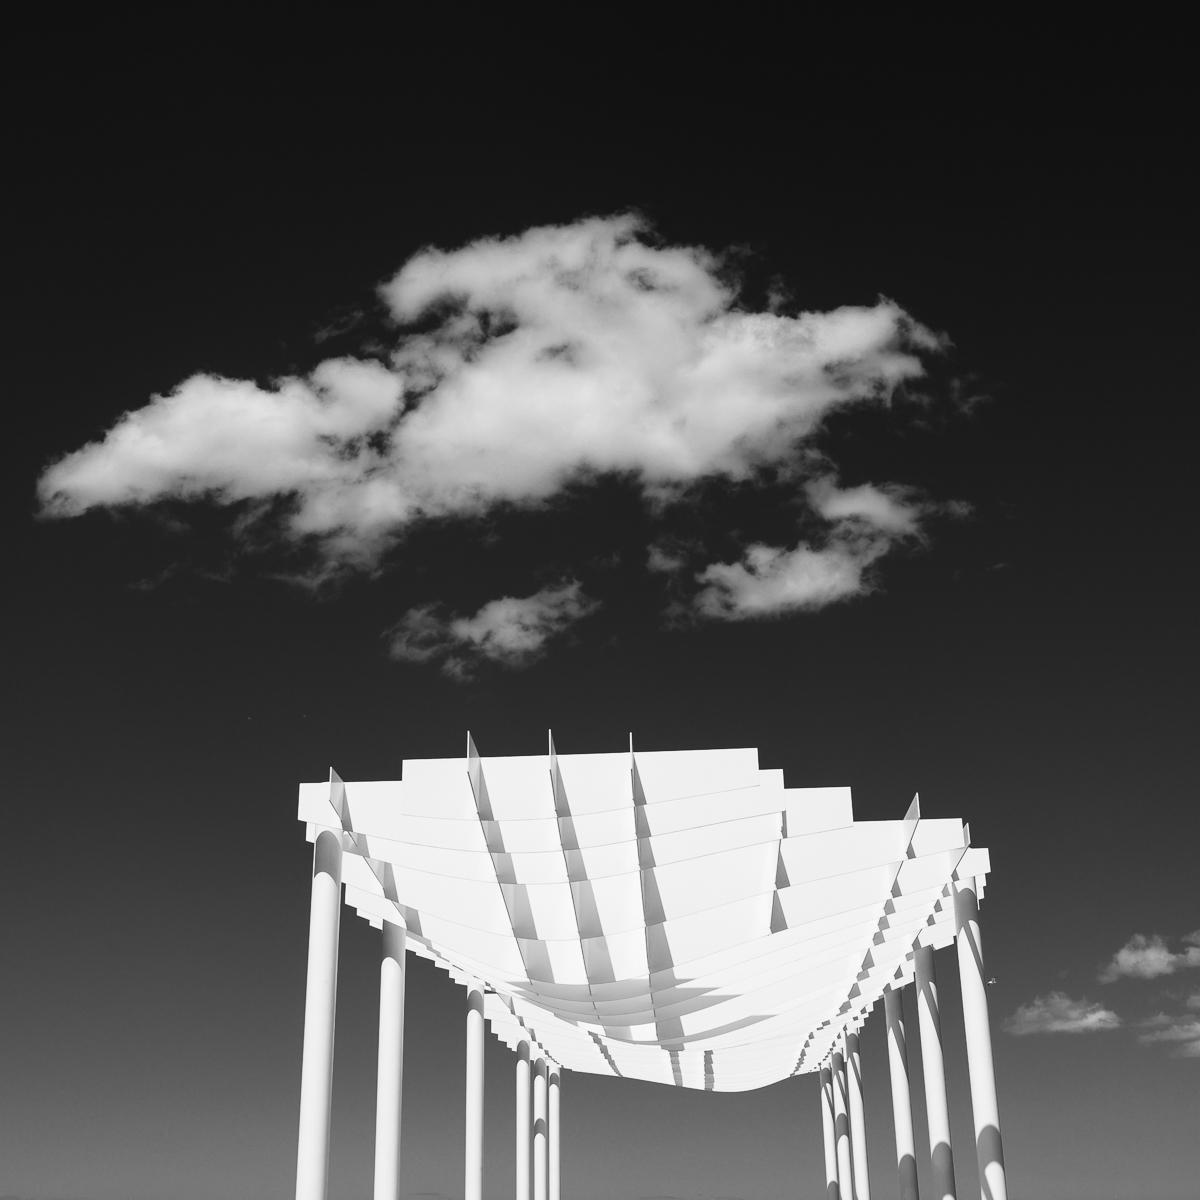
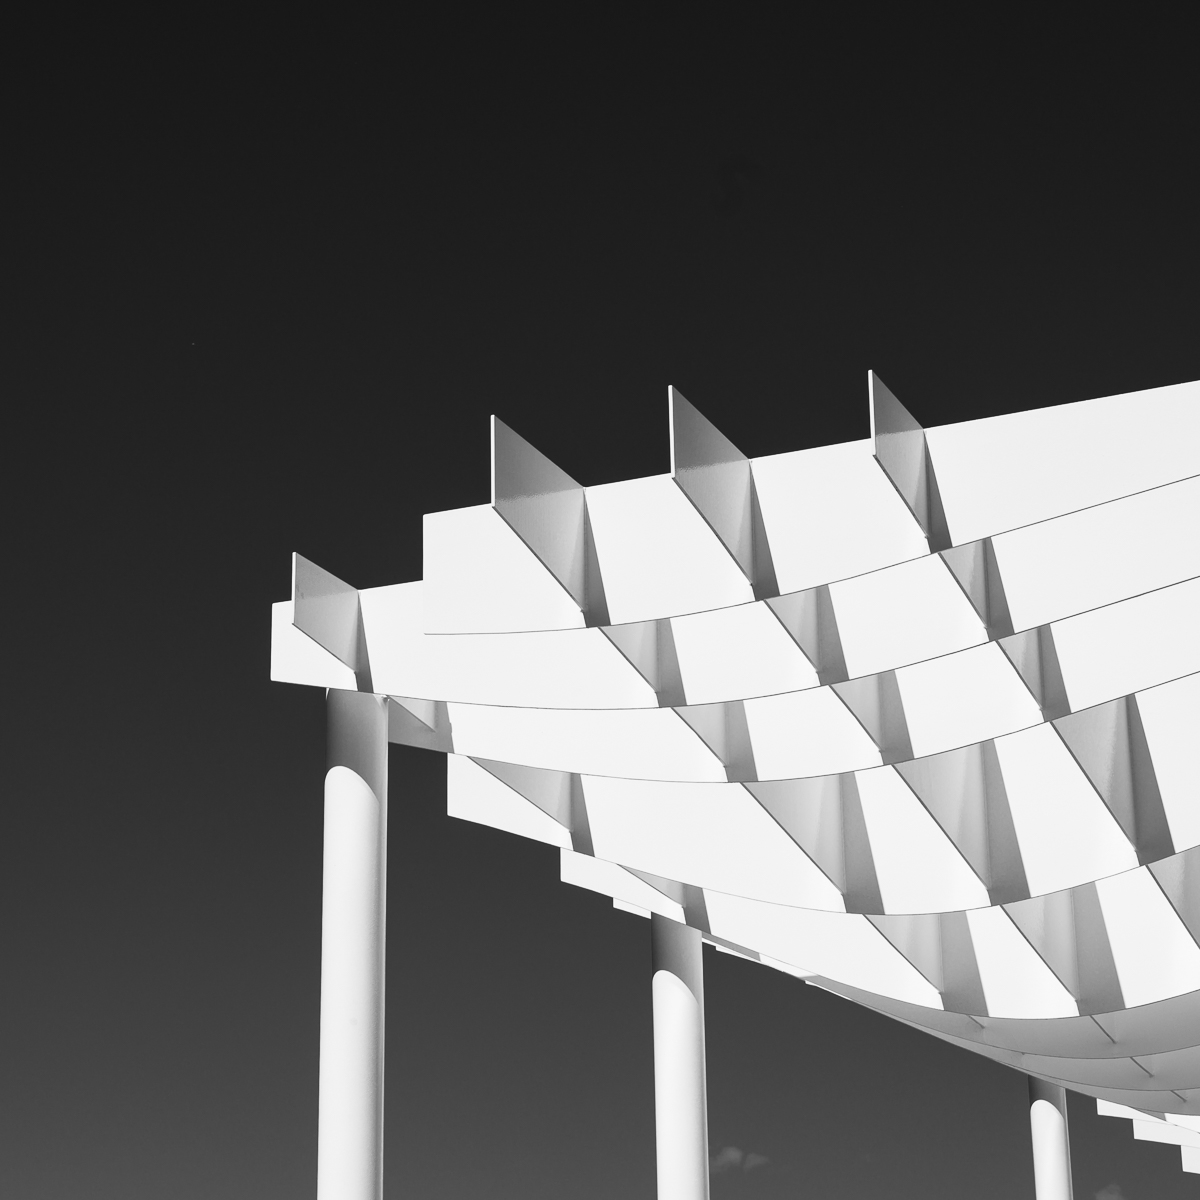
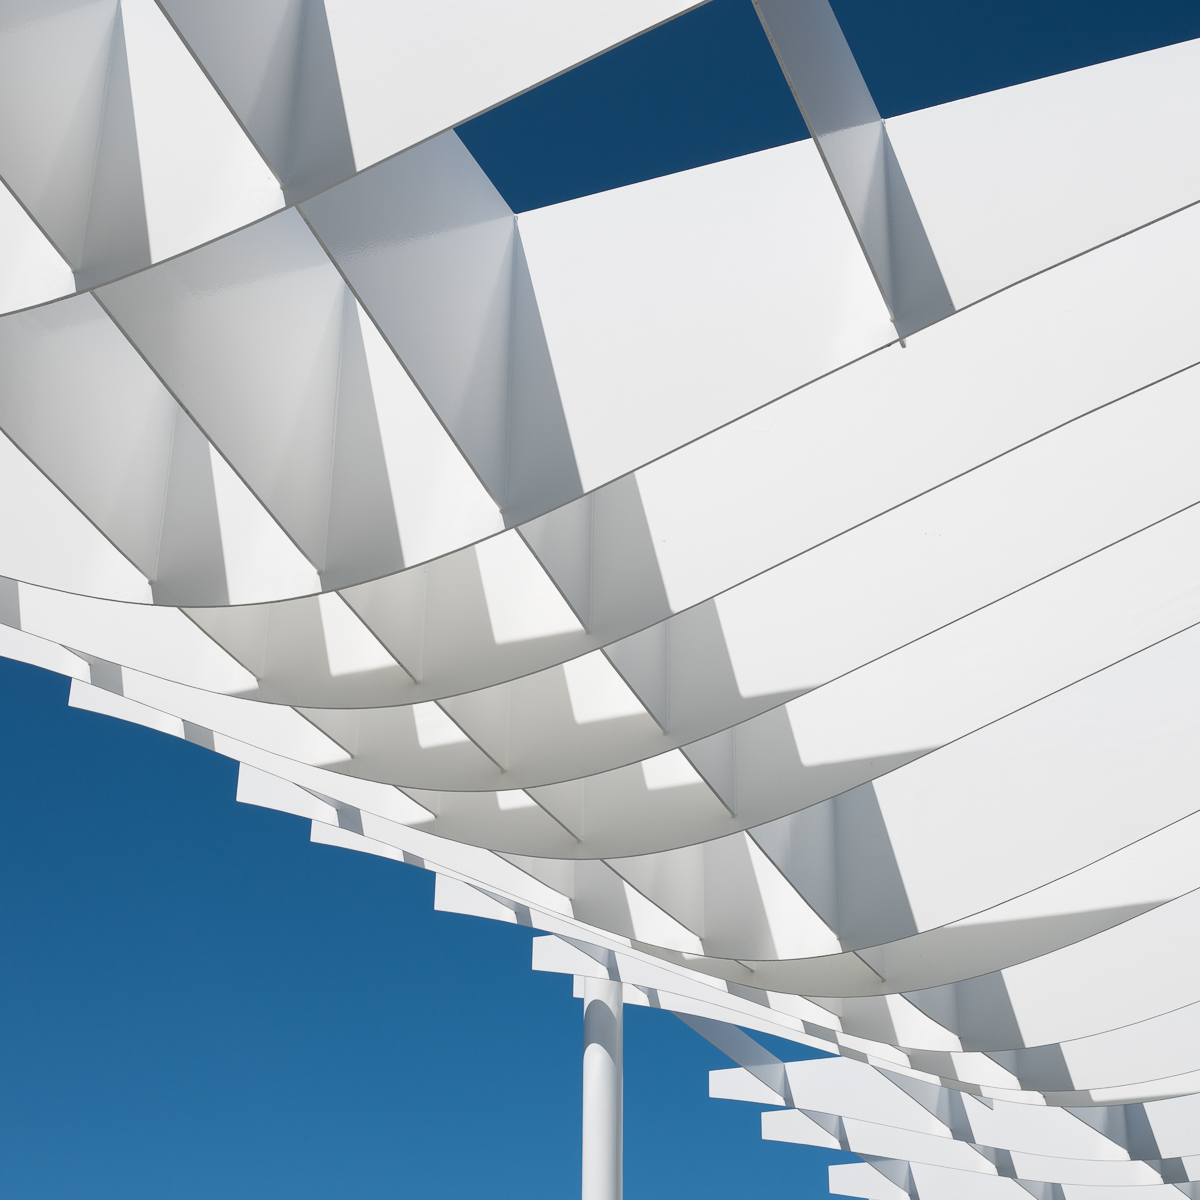
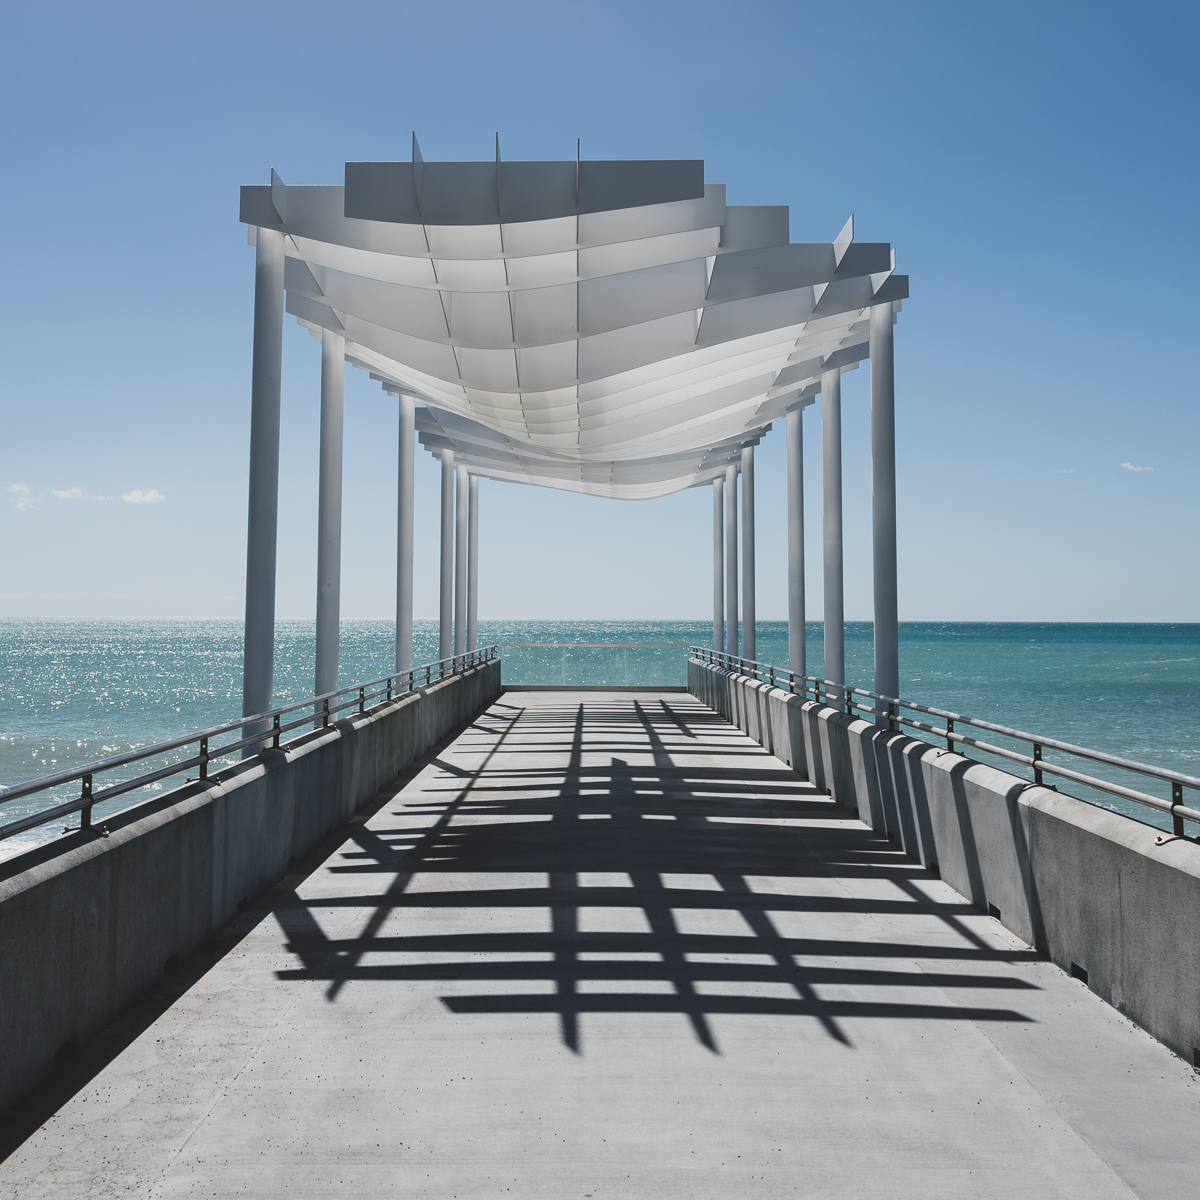
I wanted to try and show an example of how I approached a certain simple scene, with a bold graphical element, and how the images that I wouldn’t normally show contributed and brought clarity to the final image choice from that scene.

I know some photographers find they start wider and work in to find the detail, others (Bruce Percy being one I believe) start closer and gradually work wider if required. The idea of this second approach is that perhaps you have already identified the core essence of what attracted you to the scene and then you build upon it, as opposed to having to distil down to what you originally were attracted by. The ability to make the visual connection from eye to composition in camera will affect your approach here and I find that sometimes I go both ways.

The final image: A balance of extraction, colour and shape

The final image: A balance of extraction, colour and shape

The above image was made in Napier, NZ. There is an interesting modern sculpture that extends from the beach into the sea. I knew there were shapes, colours and flow to play with when I saw the structure and I’ve tried to retrospectively review my approach below, in the order the images were made.

The Process - In Order

As mentioned above, I often work closer in, further out, or indeed just throw around visual ideas as I’m exploring a scene. Some may argue this shows a lack of clarity in my approach or assessment of a scene, perhaps that I’m unclear on my purpose. However, I would argue that there are multiple ways to successfully interpret a scene or element and this working process is no different to a chef experimenting with flavours, seasoning or indeed presentation.

The images are displayed below in the order they were shot. One quick note: Yes, they are processed differently. At the time I was bouncing between colour or black and white and the camera I now use allowed me to explore that ‘live’ (which is something I’ve enjoyed adding to my process) but more on that later.

Image by Image - Developing Ideas

Image 1

IMAGE 1: This is the first image I shot of the structure. There were certain things going though my mind immediately that led me this way:

  • Part of the attraction was the shapes of the structure. I wanted to emphasise these by extracting and abstracting them from the overall construction.

  • There were various people stood under the structure, one way to cope with that is to simply remove them from the scenario.

  • The structure had a clean white colour and the high-key black and white treatment helped add something to the graphic design.

  • By extracting this segment there is some ambiguity about what we’re actually looking at and that forces us to look more at the shape and flow rather than tying it to an objective structure.

Image 2

IMAGE 2:

  • Stepping back I wanted to show the structure a little more clearly, essentially making it more obvious.

  • I chose to do this partly because of the cloud above which I thought added balance. Arguably it could work without but because the ‘legs’ of the structure are cut-off, I felt it needed a similarity in the sky (i.e. something else light) to potentially distract from the fact those legs don’t finish.

  • It doesn't really work. The clouds on the right hand side are a bit distracting and there’s not getting around the cut-off legs issue. What you can’t see is that there are still people there so I was compromising by framing higher into the structure.

Image 3

IMAGE 3:

  • Moving back in helps create a stronger image.

  • It’s let down by the small clouds near a couple of the lower legs, and perhaps the whole composition is too bottom right heavy.

  • Direct sunlight and blue skies vs white structures can work very well in B&W and it was good to preview this live using the viewfinder on the Nikon Z6.

  • Undoubtedly this closer approach leads to the next image (my preferred choice). The cogs are turning…

Image 4 (My Preferred Choice)

IMAGE 4:

  • You can see this is perhaps a result of the previous images where I’ve been trying to find the right balance between extraction and compositional flow.

  • In my opinion this is the best balanced compositionally because the visual ‘weight’ of the structure is evenly dispersed across the frame, with room to breathe in that bottom left corner.

  • In terms of colour vs B&W, although it was potentially B&W inspired you just can’t beat a clean blue and white combination. The contrast allows the structure to ‘pop’ out of the background.

  • The lack of any pesky clouds helps and I stood for a moment waiting for them to clear accordingly.

Image 5

IMAGE 5:

  • The postcard shot! This is more of a record shot for me. Finally everyone cleared away and so I took the chance to shoot the structure in its entirity.

  • The strong foreground shadow adds some depth and interest but fundamentally I find the extraction shots more visually interesting. This is because of the focus on flow, curves, lines and the semi-abstraction which adds some ambiguity.

The Process - Retrospectively Deconstructed

You may ask: Are you really thinking these things as you shoot? The answer is yes to some degree, and perhaps some is happening in my sub-conscious. It may seem indulgent to retrospectively project a thought process onto the images afterwards but I find that de-constructing your own images and shooting patterns is a helpful way to self assess and improve.

New Nikon Z6

New Nikon Z6

I mentioned earlier that shooting digitally informs my process. I’m happy shooting film sometimes but I do find that one major advantage of digital is the chance to immediately review and tweak compositions. Part of me is heavily influenced by the Precisionist style of work that I love to see, and that side fights with the looser, exploratory style I often employ when trying to unlock the compositional essence of a subject or scene.

The chance to not only see the composition in the required aspect ratio through the viewfinder, but also to see it in potential edited form (i.e. choose from multiple processed versions) on the new Nikon Z6 that I use has been a really helpful creative tool. It allows me to get as close as possible to the finished article at the moment of capture. This post is not about gear (although there will be a Z6 review coming soon), but gear here is relevant, it affects how I approach a subject and thus the final outcome.

In Summary

If you’ve made it this far then hopefully you’ve found some of this interesting. I would certainly recommend looking back at your shooting patterns. Perhaps start with your chosen ‘winner’ from one scene or another and then look at how you shot before and after that at the same scene/location. There could be some points to learn from and you may start to see common threads to how you approach things. Were you waiting for a different light? Did you change the composition? If so, why? Did you get stuck in one place? Could you have moved around more, explored a different angle? Were you thinking about the finished image? This de-construction may help you think about a new way, or indeed it may simply help you become more efficient in your shooting approach.

Maritime Alps, France - Rustic Charms & Hidden Gems

Having visited this area a handful of times in Spring and Summer I was keen to return in Autumn to see the seasonal variation. So, with a 3 day window towards the end of October being my only chance this year I scheduled a quick trip hoping for some autumnal colour and the last kiss of warmth for 2018…

Arriving in Nice is usually a warming experience, not necessarily for the welcome but due to the weather! The plane actually runs parallel with the shoreline as it prepares for landing and you can see the sparkling boats of the glitterati laid out below in opulent harbours populated by the mega-rich. It’s such a tonic to know that just 20-30 minutes away lies a little oasis of calm and a collection of charming French villages.

Around Vence 

My base (and our base during the May 2019 tour) was in St Paul de Vence. A charming and extremely well-maintained old village up in the hills behind Nice. St Paul (as it’s called by the locals) is a hub for modern art and as you wander through its beautifully cobbled and windy streets there are multiple galleries and stores selling all manner of fine art including paintings, sculptures and mixed media. There is also the famous Fondation Maeght which houses a world-renowned collection of modern art. Exploring with the camera here is a relaxed affair, and there are shooting opportunities during the day and night.

Just 15 mins from St Paul de Vence is its big brother Vence. This has the feeling of a busy town but it has a beautiful historic centre including a walled old town and also a small ‘ghetto’ area (of the historic type). This allows for a wide variety of image making possibilities and Vence has a great selection of colourful facades and doorways to explore. The great painter Henri Matisse spent a lot of time in Vence and you can see there is a strong history of art in the area.

Rustic Villages

Nearby to St Paul is the attractive Tourrettes-sur-Loup which clings onto a hillside and has a charming square. Not only do they do wonderful food here but the Church has a very aesthetically pleasing interior and can be a good spot to grab some respite from the sun if required. Exploring man-made shapes and architecture can help develop your eye for spotting natural curves, lines and arcs in the landscape and as such I love exploring these locations. 

About 30 minutes away you can climb further into the mountains to visit smaller villages. The further into the mountains you go, the more rustic they become! Carros is at the entrance to this upper Alps area and it has beautiful cobbled streets which look great at night in particular.

As you travel on from Carros the villages get smaller and smaller and the textured rustic nature of these hideaways are great to play with photographically. Shooting in these villages generally may well appear easier than it really is. I am an avid lover of wild landscapes but over the last 2-3 years I’ve enjoyed the challenge of making order in these more enclosed and inhabited spaces. It’s my belief that the end results need to be compositionally sound and watertight to be successful and that does take some time to finesse. For anyone out there who’s used to the wider vista this would be a stimulating and rewarding way of re-seeing order in compositions.

The Loup Gorge & River

It’s not all about the villages in this area though. The Loup river runs down through the Alps to the sea and there are a number of river areas and waterfalls to explore. Our tour in May 2019 will explore a beautiful river walk which offers lots of opportunities for detailed abstract shots and indeed experimenting with shutter speeds and creating shapes in the water. We’ll also spend some time at the Saut du Loup waterfalls which I’ve become slightly obsessed with! There is a gorgeous sweeping natural arc in the rock here and it’s the kind of place you can spend some time really playing with shutter speeds and compositions. Be it capturing the wider scene or focussing in to a set of abstracts. 

What to Expect

 Throughout our time here in May 2019 we’ll explore other small towns and villages including Antibes on the coast which has a nice mix of old and new and houses the fabulous Picasso Museum– what better place for some inspiration! I’m also keen to discuss composition in further detail with guests and this will involve some image review sessions and conversations about finding order in busy scenes.

Due to the variety of shooting locations there will also be chance to explore and develop alternative techniques such as long exposures, ICM and Multiple Exposures. There will also be time available to discuss using correct filtration and other core principles of photography. 

In summary, this area has a charming and relaxed feel, even though its so close to the contrasting hustle and bustle of the Cote d’Azur. Personally I can’t wait to go back and would be delighted to see you there.

It's just "Click Click"...

Photography is easy, right? It's just "click click", or so I'm told...

I have two wonderful nieces aged 10 (Rebecca) and 6 (Chloe). I recently took them out to the woods for a picnic on a warm Sunday afternoon. The 10 year old is very bright and curious and she was asking me about my photography. I'd just been away for a few days preparing a workshop and so I was telling her about what that involves and why people come away for a few days with a photographer to improve their skills and enjoy a nice location. I could see the cogs whirring away inside her mind at high speed as the slightly quizzical look on her face sharpened...

click.jpg

"I don't really get it" she said, "taking a picture is easy, its just click click, right?!" - These are the words of a 10 year old who's just got their first mobile phone! After an initial hesitation about opening this particular can of worms my obvious answer was that yes, the action of taking the picture is easy, it's just the click of a button. However, there can be pictures that are more interesting or less interesting - I was trying to avoid good and bad, and don't get me started on calling them images not pictures!

As she has some musical prowess I gave the example that playing a note on the piano is easy, you just press it, but playing a piece of music is a bit more complicated. I was making progress in winning her over on this so then we got into what makes a photograph more interesting. Anyone with kids can imagine this was just the start of being pulled into the conversational rabbit hole where the questions come at you from often very unexpected angles of thought!

The 'Golden Spiral' - The proverbial rabbit hole of compositional hypotheses!

The 'Golden Spiral' - The proverbial rabbit hole of compositional hypotheses!

After 10-15 mins or so of me trying my best to distil my thoughts on composition, light, form, nuance, subtlety and the work of the great masters she rather diplomatically took pity on me and said "yes, I suppose some pictures are more interesting than others - I took a great picture on my mobile phone of Chloe wearing rabbit ears and it's amazing!"...Rebecca 1-0 Sam

So, next time you're agonising over a composition, just stick some rabbit ears somewhere in the scene, go click click and you'll be sorted :)

Fathers Day Reflections: More Than An Image...

Some of you closest to me know that sadly my Dad passed away earlier this year. Being the soft (ahem!) Northern romantic that he was, he picked Valentines Day as his time to leave us - he never did like it! In the subsequent weeks myself and the family were going through some old photos and looking back over Dad's career and work life. It got me thinking just how important images (and printing) can be for all of us, and how perhaps as some of us landscape photographers chase our 'created images' we shouldn't forget to take a few 'pictures' along the way...

Dad at work...

Dad at work...

After leaving Music College in Manchester my Dad went on to be a professional Trumpet player and musical arranger. After a period of playing he also moved into teaching and specifically he set up the Manchester Youth Stage Band which was the only band of its kind in the North and mirrored the National Youth Jazz Orchestra which was very much centered around the South. The subsequent huge success of the band led to him appearing in certain Newspaper articles and it's with great joy that not only did we still have the original cuttings but also some of the prints that were made at the time by the photographer - well done that photographer!!

Without these prints being made at the time I wouldn't have been able to scan them and store them for generations to come. I can even re-print them as necessary, and although this particular picture (above) is a posed photo for a press photographer it also tells a story nicely about Dad. It sets the scene of what he does, Trumpet lying to the side and music manuscript on the desk. And for those who knew up him best the familiar left hand holding of the pen can bring back memories of him working away at home around the family.

Dad pointing at the bread...and why not!

Dad pointing at the bread...and why not!

Among some of the press images we stumbled across this beauty (above) - none of us ever got the story of why he was pointing at the bread but no doubt it was an advertisement or similar in the local paper. On the surface it's a light-hearted picture to cherish but for me I can see that smile on his face that I also saw all through his life and even into the final days. Again, the importance of this being printed at the time and stored away can't be underestimated for us now to reflect upon.

I for one am very guilty of partitioning my photography into solo trips into the landscape, it's very rare that I'd have my camera out at a family gathering. With young nieces this is surely a shame because I should be utilising my skills to capture moments of their youth that they can enjoy in many years to come. It's so alien to how I would normally work photographically but that's the point, it isn't work, it isn't a job, we should all feel no pressure to just shoot away in those circumstances, even with just our smartphones. And, let's all make sure we do some printing so we can keep these memories for years and generations to come...

If you're seeing your Father, Dad, Old Man (whatever you want to call him!) today, why not make sure you grab a picture or two for the future :)

Sam

Dad043.jpg

Five ways to blow £2,000 improving your landscape photography...

With the release today of the NEW Canon 6DMKII it got me thinking, if you have a cool £2k burning a hole in your photographic pocket what's the best way to invest it in your image making progression & enjoyment as a landscape photographer? Here's a few options...

1. Buy a Canon 6D MKII

As a Canon 6D (original) owner I have been conscious that my poor old boy might be superseded at any given moment. In fact, when I bought mine for just under £1,000 (thanks Cashback offer!) a couple of years ago it already occurred to me that I was buying something that would soon be replaced, BUT I had the money, I 'needed' a better camera and I bought it and have been very happy since, it's a very capable bit of kit, even in a culpable pair of hands.

So, the obvious question is - in the hubbub of promotion and advertising, should I blow my sadly imaginary £2k on the new model, ahead of any other investment?

The Verdict:

Boasting an improved sensor based on the newest Canon design this 6D MKII 'should' possibly give me more detail and more dynamic range and quality. I will never know this without buying it though, and that's a bit of a problem. I could possibly hire one for a few days but it always feels like money you could have invested in buying. Will it improve my compositions? Will it enthuse my creative juices and expand my artistic vision? No, is the blunt answer but we mustn't be too harsh, the kit needs to be good enough to help us realise and execute our aesthetic vision.

The new 6D MKII also has an ISO to 102,400 (expanded) so when I get booked to shoot that series of gigs in a cave with candle lighting I should be ready to rock...I won't hold my breath, we all know that once you go past around 6400 things start getting a bit sketchy. It also features a 45 point AF system - as someone who only ever uses the central point, and actually more often than not I use manual focus, I really can't get excited about this for landscape & outdoor photography. I'm not shooting birds, or formula 1, and on the odd occasion I've had to do commercial shoots with people I've found the 6D to be perfectly capable as it is.

The final main tech change (at a glance) is the articulated screen. I must admit on occasion, when in a tight or uncomfortable spot and I'm precariously balanced on a rock by the sea or similar I could find this useful, also when shooting video it can be preferential - but it's not a deal breaker.

2. Go on a Workshop or Tour

Depending on who you go with I reckon £2k could get you a 4-6 day workshop to a fairly interesting location. Just looking around briefly it could take you to:

  • New York (Light & Land): Charlie Waite & Paul Sanders (sadly fully booked for 2017!)
  • Isle of Harris (Bruce Percy): Mentoring workshop (also fully booked for 2017!)
  • Tuscany (David Clapp): At £1,649 you've got some spare spending money!
  • South Africa (Alex Nail): Get off the beaten track and have an adventure!

These are just some quick examples but all are in great locations, and most importantly are with experienced photographers and leaders, whether you're looking for classic landscapes, cityscapes or a slice of adventure. There are many options out there so do explore!

It always amazes me that this niche world we operate in is so accessible. I've used the analogy before but imagine being into football and being able to go on a training course with Messi or Ronaldo for 5 days with a handful of other people and it costs under £2k - mind blowingly impossible!!

The Verdict:

I've been on a handful of workshops in my time, some more useful than others. But, on all of them I learned something, perhaps some technical development, or a new approach to 'seeing' or indeed useful post processing tips. Whatever it is you will learn something, plus you get to see a new location and meet some other like minded folk. What value on just indulging in photography for a few days - priceless! (well actually it's a few hundred quid as a minimum).

It may depend on your experience level, or if you really enjoy and admire the work of one photographer. Why not meet them and see how they work and let them give you some help. Even if you are very experienced there's always something new to know.

3. Take a 1-2-1 or Portfolio Review

Slightly different to taking a workshop here. I'm talking about either a day or two in a 1-2-1 situation (of which you could probably afford a few different options), or perhaps submitting your portfolio to a range of photographers for some critiquing, or taking a closer look (sorry about the picture below!)

600_Critique.jpg

The Verdict:

This is a different vibe to a workshop where you will be in a group environment, this has its pros & cons. With your £2k you could probably organise some one or two day sessions with two or three different photographers. Let's say two for arguments sake once you add in travel and food etc.

Although you would have less days out than on a workshop you'd probably get as much, or more individual help and focus. This short sharp burst of assistance could really open your eyes to new techniques, different ways to approach image making, or mastering some technical element you've struggled with. Don't be afraid to really invest in yourself and get expert assistance!

The other option is submitting your work to few different photographers for portfolio reviews. The worry with this is showing 5 or 6 people may lead to some broad comments that could leave you without focus, or you may see common threads in the critique which could easily point you in the right direction...something to consider at least. You could send one and save most of your ££!

4. Travel

Let's say you're feeling pretty assured, you may already have a good grasp of what you're trying to do with your photography or you just enjoy the escapism and don't want to be in a group. I reckon for £2k you could have a pretty great time traveling yourself and making a strong collection of images:

Here's a sample itinerary to stimulate the mind:

  • Plane from London to Scotland (£99)
  • 5 nights in The Highlands (£600-£700 inc.food)
  • Plane from Scotland to Venice (£149)
  • 3 nights in Venice (£500-£600 inc.food)
  • Train to Tuscany (£40)
  • 2 nights in Tuscany (£250)
  • Flight back to London (£175)

The Verdict:

Depending on your travel tastes and style this may or may not be (a) possible and (b) float your boat, but you get the idea. You could go off piste a bit more and try some less 'classic' locations. I know my friend and colleague from The Togcast (Photography Podcast) Paul Sanders has been exploring Albania & Romania for example. You could also get over to South America and back (just!) so the world is your oyster!

I personally find that traveling alone is when I'm at my best photographically. With a very loose itinerary it's even better, just allowing me to find locations, re-visit them and just imbibe the atmosphere and get to know somewhere. Check out this portfolio I made in Scotland with a £250 film camera! Perhaps even try shooting some candid portraits of the locals, or just sit on a mountain for 6hrs watching the light, it's up to you and you probably have a decent enough camera to catch it all already. You may also find this total immersion does wonders for your creative eye.

5. Alternative Equipment - Go Retro!

Ok, so this is a bit of a twist on No.1 but I'll try and make a valid argument for it below. Pictured is a Hasselblad 500 series film camera, used by some of the masters of photography, your £2k could buy you a Hasselblad 500CC with 2 or 3 lenses and leave you enough spare dosh for a roll of film or two and some processing. That's a Swedish made top end body (revered by many) + lenses for the price of a mass produced digital body only.

600_Hassy.jpg

The Verdict:

So how would this help your development? For a start it would make you slow down and appreciate the value of each image. When it costs a few quid per shot (after taking into account film/development/scanning) you soon start to cut down on wasted shots and take a little extra time over each composition and asking yourself "is this really a great shot?" before you hit that shutter (oh and what a sexy shutter the Hasselblad has by the way - kerchunk!!).

With a good scan you can blow 26.2 MegaPixels out of the water for re-production purposes and can anything really beat that authentic film look? Perhaps the fact you're slowing down and becoming more selective may also improve your eye and own self-critiquing before the shutter is released, knowing when not to shoot is as important as knowing when to shoot here.

However, it's still a piece of kit - and pieces of kit only produce when you are somewhere, so perhaps only go for this option if you've got your travel or workshop already booked ;)


The Summary

You've got to do what feels best for you! First off, ask yourself if you get out enough and if you do then check out what gear you have and if you feel it's really holding you back or affecting your image making chances negatively - if so, explore those new cameras!

If, like many, your main challenge is actually getting out enough or indeed wanting to really improve your art then perhaps you could consider the other options.

The final option is to give me your £2k and I'll happily spend it for you!